


Frequently Asked Questions
At Hozelock, we receive many Frequently Asked Questions (FAQs). Therefore, this page includes many of the answers you may be looking for. If you have a product related query please click on the image or link below to go to the section that provides answers to the questions we are frequently asked:


Watering
Hose Reels
A: Yes. Replacement inlets can be purchased from our spares website. Part numbers: Z71033 and Z71040
A: You can get replacement instructions by downloading them from the Hozelock web site www.hozelock.com
A: Yes. They come in 2 different sizes – 1 inch BSP (approx. 33mm outside diameter threads) – part number 2158 and 5/8 inch BSP (approx. 22.5mm outside diameter thread), which can be purchased from your local stockist and part number Z21755, which can be ordered from Consumer Services or our spares website.
A: From Customer Services or through our spares website.
A: Yes. Replacement handles are available from Consumer Services or our spares website.
A: Check that you have an appliance on the end of the water-stop connector. If not the water will not come out.
A: Check that the locking lever is off.
A: Take out the red transit tab from under the base to stop this.
A: Yes. This is available as a spare part from Customer Services.
A: Remove the connectors from the end of the hose and pull it out of the grey hose guide. Untangle and remove the hose from the reel and make sure that you rewind it using the winding handle in the same direction of the indicator arrow on the side of the green casing.
A: Check that the green cir clip is still in place, If this is missing, the inlet will be loose and may leak. You can get a replacement – part number: Z71020 from Consumer Services or from our spares website.
A: No we strongly advise taking the hose or hose reel unit indoors unless actually being used. All our wall mounted products are easy to remove from the wall and have “park Points” to attach the inlet and outlet hoses to. This stops water leaking out of the unit whilst indoors. Please note that damage from frost will invalidate the guarantee.
A: Pull out all the hose. Clean any excess debris from the outside of the hose such as sand dirt etc with a damp cloth. Now let the hose retract slowly by walking back to the reel holding the end stop. This often allows the hose to layer properly again. When rewinding the hose always walk the hose back to the reel. Never let the hose fly back on its own. Not only is this dangerous it can cause irreparable damage to the reel.
A: Make sure you are winding in the correct way. There are arrows on the side of the case showing the correct direction. You will have to unwind the entire hose and rewind in the correct direction.
A: No, we do not offer a repair service for Auto Reels.
Fittings and Connectors
A: These can be purchased through your local stockist, through Consumer Services or on our spares website. Part numbers: 2299 and Z73045
A:
Please check which Connector you are using. A Hose End Connector should be used at both ends of the Feeder Hose and not an AquaStop Connector.

If you have the AquaStop Connector on the Feeder Hose, this is likely to be the reason for the connector to pop off.
If you have used the correct connector, please check that it has been fit correctly to the hose. If you are unsure of how to connect your Hose End Connector to your hose, please refer to the next frequently asked question in this thread.
A: Please try part number: 2299, which can be purchased through your local stockist, through Consumer Services or through our spares website.
A: To secure the Hose End Connector to the hose, please ensure that the hose tail on the connector is unscrewed. Then insert the hose so that it fits into the connection grip, once complete push the hose tail back onto the connector, and securely fasten it. Please take a look at our ‘How To’ video below for guidance.
Sprinklers
A: The most likely cause is limescale in the gearbox which can build up inside if water is left in. Try taking the end plug off and spraying a lubricant such as a 3 in 1 oil into the blanking plug end and also the end where the hose is connected. Leave the sprinkler overnight and allow the oil to drain out (ensure the floor is not damaged and there is no slip hazard caused). Refit the blanking plug and try again. This can be done at the end of the season when the sprinkler is put away. Leave the end plug out and hang it up so that excess water can drain away.
A: Check the red setting rings to ensure they are in the correct position. There are two, if one is set near the top, the sprinkler will only oscillate in one direction. This is so you can choose the exact area of your garden you wish to water. To resolve it, push both red setting rings down to their lowest positions to choose maximum area coverage.
A: To connect a sprinkler to your hose, we advise using an Aquastop Connector to the end of your hose, followed by connecting this to the male connection on your sprinkler. If you do not have a male connection on your sprinkler, you can purchase a Hozelock Accessory Adaptor that will enable you to connect the sprinkler to an Aquastop Connector.
 1.0.0.20
Spray Guns
A: What’s is happening is that there is a lot of water contained in the rose housing and when you switch to another setting this water has to empty. It will stop after a few seconds but you can speed this up by shaking the gun from side to side a couple of times to shake the water out.
Make sure the settings on the dial are correctly aligned and not “between” settings as this will cause the gun to leak continuously.
A:
1. Check the connection – Ensure you have used the correct hose end connector to connect your gun to the hose. An Aquastop Connector is recommended.
2. Is the gun dirty or blocked? If it is, please soak in a 50/50 mix of warm water and vinegar. The problem may be related to either a rubber seal, a build-up of mineral deposits or sediment in the gun. Ideally the gun should be soaked for 30-40 minutes.
3. Check your O ring – it it worn? If it is, please replace the O-ring. You can purchase O-Rings and Washers from our Spares website.
4. Check the water flow – this may need to be reduced.
A: We recommend soaking the trigger in a 50/50 mix of warm water and vinegar, as the problem may be related to either a rubber seal, a build-up of mineral deposits or sediment around the mechanism. Ideally the gun should be soaked for 30-40 minutes.
Automatic Watering
A: Check that you have inserted the drippers the correct way round, if they are adjustable drippers, turn them up. Go to www.hozelock.com and download our ABC Guide to Automatic Watering and check that you have the correct sized system, if the system is too long or overloaded with drippers your flow of water will be affected.
A: This can happen in older properties and/or usually means you have high water pressure. Please try our Hendrickson Pressure Reducer (93854), which stops water hammer. If this does not work, please contact Consumer Services.
A. You need to block the end of the pipe with an end sleeve. These come in the micro irrigation kits or can be purchased separately from garden centres or Customer Services.
A: You can leave the main supply tubing buried during the winter as long as you remove the end sleeve and flush the system thoroughly. You must remove the drippers and store away from frost. Also remove the pressure reducer and water timer and store away from frost, remove the batteries from the water timer.
A: No. We advise that it is used outdoors only.
A: To straighten the main supply tubing, lay it in the opposite direction that it has been rolled and put a house brick or something as heavy on each end, leaving for an hour to flatten. Soak the ends of the tubing in warm water, which will soften the plastic and make it easier to insert the connectors.
A: You can have 9 Aquapods from one mains tap, and 3 Aquapods running on any one 4mm hose.
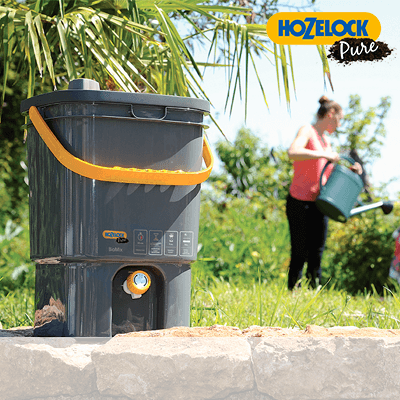
Water Butt Pump and Water Butt Treatment
A: This is a common question from customers because they either put the pump on the bottom of the water butt or do not realise there are 2 filters in the pump that need cleaning regularly. The pump must be raised off the bottom of the water butt or suspended on a rope. There are two filters in the pump that may require cleaning, the blue filter is located in the bottom of the pump, twist off the yellow grill at the bottom and remove the blue mesh filter, clean thoroughly and replace. Also remove the small wire filter from the connector on the top of the pump and clean thoroughly, this can get blocked with dirty rain water. This filter can be removed if it keeps blocking quickly as long as you are not using micro irrigation equipment (which has small orifices). Once cleaned re-prime and the flow will return. You can replace the wire filter and the connector off the top of the pump. There are no other spare parts available. To correctly prime the pump take of the hose connector from the top, Now slowly lower the pump into the water until the water level just under the outlet. Wait until you see water fill up inside the pump until the level is the same inside and outside the pump. Now attach the outlet and hose and lower the pump fully into the water. the pump should now run properly.
A: All of Hozelock water saving treatments are non toxic, so will not harm your pet. If they get an upset stomach please consult your vet.
A: The water butt treatment is a safe non toxic biological treatment that uses natural plant extracts so it will not harm wildlife provided it is diluted as directed in the instructions.
Water Timers/ Water Controllers
A: Check that you have put in new good quality non-rechargeable batteries. These will require changing every season. Check that you have set the settings correctly. Refer to the instruction leaflet.
A: There are 2 main reasons.
1. Not many people realise that rechargable batteries are not the same voltage as normal zinc/carbon batteries (or other non rechargable types). Normal batteries are 1.5v but rechargeable batteries are only 1.2v. So your timer, needing 3 volts to work now only has 2.4 volts before you start.
2. Normal batteries discharge gradually and fairly consistently over time. This is picked up easily by the timers low battery function and so the timer is prevented from opening if it cannot shut. Rechargeables give full or nearly full voltage until they are nearly out of power then the power suddenly runs out. This cannot be detected by the timers low batt function. The result is that the may have enough power to open but not close again and so you may waste water.
Car Brushes
A: The most common cause is that the liquid soap you are using is too thick and can’t be diluted by the brush dilution valve. This will be worse in colder weather. Try diluting the soap with a little water but only dilute as much as is needed at the time. If it’s not this then look at the clear bowl where the soap is held. There’s a little pipe in the middle. Make sure it’s not touching the bottom of the bowl (there should be approx 3m gap). If it is touching the bowl, unscrew the bowl and push the pipe in about 3mm and refit the bowl.
A: Make sure that the control knob is set to either soap or rinse. If it is midway this will cause the effect that you describe.
A: This usually happens when you continue to hold the brush up in the air after switching off as it’s the water in the tube emptying out. Just hold the brush bristles down.
A: No. The bristles or head may scratch the paintwork.
Hose
A: Yes you can, but depending on tap water pressure, performance may be affected i.e. slight retraction when the hose end is open.
A: No, the advertised size is the maximum length the hose will expand up to, depending on water pressure. So, a 30m Superhoze will be around 10m in length to begin with and expand up to 30m.
A: Yes, if you connect it with the correct tap connector for your tap. You can find our range of indoor tap connectors here.
A:
No. If Superhoze gets damaged do not try to repair it.
If the product is faulty, it will be covered by the guarantee that is included.
Please contact the Retailer you purchased it from, or the Hozelock Consumer Services team.
Please make sure that you retain your original receipt as proof of purchase.
A: Yes you can, but depending on tap water pressure, performance may be affected i.e. slight retraction when the hose end is open.
A: No, it is not recommended that the Superhoze is used with a Pressure Washer.
A: To join multiple Superhoze together, you can use a Double Male Connector or a Double Male Connector Pro. These work by simply clicking them into the Hose End Connector on your Superhoze.
Icons

A: Do not use with pressure or jet wash products.

A: Product to be stored inside during cold spells and winter months.

A: Recyclable packaging. Check local restrictions.
General
A: If you wish to purchase a Hozelock product, please visit the store locator on our website or try online outlets via a search engine.
A: Please accept our apologies for the issues that you have been having with one of our products, and for any inconvenience this may have caused.
The first year of the guarantee is held with the retailer, if you contact them they will be able to arrange a replacement for you.
A: If a receipt has been mislaid, please contact consumer services on 0121 313 1122.
Some of our products have a serial number and a member of our consumer services team will be able to help you locate this. The serial number will help us to work out the date of manufacture, so that we can see the product is still within its the guarantee period.
A: To extend your Hozelock guarantee, please visit: https://spares.hozelock.com/guarantee
To be able to claim against your extended guarantee, you must ensure that you keep your original receipt and that you register online within 30 days of the purchase date.
Please see Hozelock’s Guarantee Statement for more details.
Spraying
A: Yes. These can be purchased from some Garden Centres or Customer Services.
A: This could be due to a split non-return valve located at the base of the pump mechanism or perished washers and seals. A replacement seal kit is available from Customer Services. It’s important to distinguish between losing pressure and not achieving pressure. First check is to remove the pump and place the bottom of the pump against the flat palm of the hand (wearing rubber gloves if a chemical is present). Pumping the pump should result in pressure being felt coming out of the black non return valve of the pump. If this is so then the bottle is probably getting pressure but subsequently losing it. If no pressure is felt then the sprayer isn’t getting pressure in the first place so the most probable cause is a faulty/missing/dry plunger O ring or leaking non return valve. Replace or lubricate as necessary.
A: The sprayers have been designed to apply water based garden chemicals and are not generally suitable for applying shed/fence treatments. The Multi 5L (4455) sprayer and all those in the Viton range are equipped with special seals, which allows them to spray a wider range of treatments. Considerable care needs to be taken though, to ensure that the intended treatment is suitable for use with sprayers and that the sprayer is thoroughly cleaned after use.
A: Yes. The different handle styles can usually be accommodated by the latest design. These can be purchased from Customer Services.
A: The most likely cause is grit or dirt in the on/off control. In which case dismantle the on/off control, clean thoroughly and replace. If the spray fails to shut immediately and continues to dribble out it could be due to air being trapped in the lance. To remove any air, hold the lance in a vertical position pointing away from you, toggle the trigger on and off until the air is discharged, then continue spraying.
A: From some Garden Centres & Customer Services.
A: From Garden Centres, DIY multiples & stockists of our products.
A: No. They are not available.
A: No. They have been discontinued.
A: A simple way is to fill the sprayer approx ¼ full with clean water. (make sure there is no residual chemical in the sprayer and wear rubber gloves and safety spectacles). Pump the sprayer to pressurise it and then tip it upside down and observe for leaks. All the seals on the bottle will now be covered with water not air and so leaks will be clearly seen as water dripping. Replace seals or tighten components as necessary.
A: This can be due to many things. Here are a few examples.
1. The sprayer is left pressurised – ensure pressure is vented by pulling the pressure release valve after use.
2. Chemical is left in the sprayer – clean any chemical after use and flush through with clean water.
3. The chemical used is corrosive. – only use branded garden chemicals suitable for treating garden pests or problems. Don’t use the sprayer as a spray gun for spraying paint thinners or any other chemical. Definitely don’t use anything containing white sprit as this will cause the bottle to age harden and possibly break.
4. The sprayer has been left in the sun – this can cause the seals to dry out so ensure sprayer is put away after use and not left in direct sunlight.
5. The seals are not lubricated. – Moving seals such as the piston in the pump and the o rings in the tap need regular lubrication as any chemical used may dry the seal out over time. Remove the necessary parts and lubricate with either silicon grease or Vaseline.
A: Yes, these are available from Customer Services.
A: No. Not only is this highly dangerous, the pressure in the bottle when pressurized is too great for any adhesive to seal it effectively. Do not take chances. Renew the sprayer.
A: The plastic used in the lances is a high-grade resin, is more resistant to bending and kinking than the aluminium and will last at least as long.
A: This is a far reaching question as it’s not only the suitability of the sprayer that needs to be considered but also the suitability of the chemical when being sprayed. Volatile chemicals can be very dangerous when sprayed and care needs to be taken whatever chemical is being used. Normally any propriety substance for garden use can be used. If in doubt the best course of action is to contact the supplier of the chemical and ask if it’s suitable for spraying using a pressurized sprayer. do not use the substance. of course always wear protcetive goggles gloves and a mask when spraying.
It’s also important when mixing chemicals to make sure they are mixed correctly. Some chemicals can be mixed with water but the chemical might need adding to the water and not the other way round so check the instrcutions.
Remember the golden rule “Safety first – Gardening second”
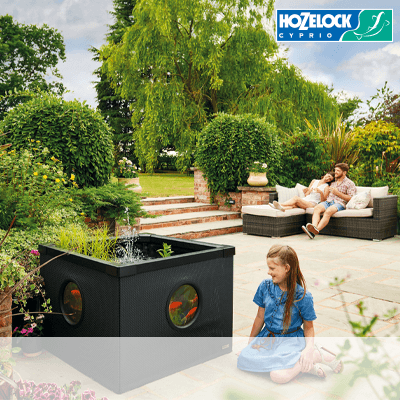
Aquatics
A: It is a system for filtering, clarifying and maintaining healthy, clear pond water in a garden pond environment. A pond filter system is made up of three main items:
Filter – the filter works in two ways, mechanically and biologically. Mechanical filtration means removing the solid particles that cloud the water. Biological filtration removes the pollutants that can be harmful to fish.
U V C – an Ultra Violet Clarifier clumps together the algae that cause green water so that the filter can then remove it.
Pump – a solid handling pump will pump dirty water into the UVC and filter. The movement of water will also introduce oxygen into the water, which is needed both by the fish and the beneficial bacteria in the pond.
A: Most filter systems are “pump fed”. This means that the pump is in the bottom of the pond as far away from where the water returns as possible and at the deepest part. The UVC and filter are placed together at the edge of the pond connected using the largest bore hose possible to ensure a good flow rate. Pond water is pumped (by the pump) to the filter and UVC and then the water returns under gravity back to the pond.
A: The deciding factor for choosing which equipment to use is the volume. The first thing to do is calculate this using the following formula:
Average length (m) x average width (m) x average depth (m) x 1000 = pond volume in litres
Add on 25% if the pond depth is less than 70 cms. Add on another 25% if the pond is in sunlight during any period of the day. The figure that you arrive at is the size of filter that you are looking for. e.g. if the answer you arrive at is 5500 you would chose a filter with this rating. If the size of your pond falls between 2 filter sizes then always chose the bigger size as it is better to over filter than under filter. The pump to go with the filter as a general rule is rated at approximately half the size of the physical pond volume (not the filter size chosen) and should mean that at least half the pond is filtered every hour.
A: To begin with you should not turn on the UVC until the filter is mature. This can take about 6-8 weeks and is the process whereby the filter is colonised by the friendly bacteria that keep the water healthy.
A: Once fully mature you should notice a difference within one week of turning on the UVC and full clarity should be achieved in two weeks.
A: The useful working life of the lamps is 12 months. We would therefore advise that you change the lamp at the start of every season.
A: The only thing that needs cleaning is the quartz tube. If there is a build up of limescale or algae on the tube it needs removing so the UV light can reach the water. This can be done with mild non-abrasive cleaning agents or even vinegar.
A: It is always best to have a standby pump available in the event of a pump breaking down. The standby pump can be much smaller as it only needs to produce about 50% of the normal flow to keep the filter system running.
A: A filter will need checking from time to time to make sure weed is not clogging it up. Apart from that it should normally be kept running 24 hours a day. You should normally clean 25% of the foams in your filter once every 2-4 weeks in pond water, as long as it is sized correctly and the pond is not overstocked with fish. However you should only clean the foams when absolutely necessary. This is when they have become completely blocked. The plastic media should not be cleaned, as this would risk killing of essential bacteria. A normal cleaning regime as we have just outlined would mean that you would need to change the foams after approximately 3-4 years.
A:
Try the integral flow adjuster if there is one.
Check the strainer and impellor are clear of debris and limescale.
Check rotor assembly is pushed fully into the motor body and is not damaged or worn. Rotor assemblies need replacing periodically and can be purchased via our helpline.
Ensure recoil flaps are in position and free to move on their pivots.
Check the fountain stem/head for blockages.
A: Is the pump humming/buzzing? If so check above.
If it is completely dead, check power supply, fuse and wiring. If all of these seem in order contact the Hozelock Customer Services helpline for help.
A: Check power supply, fuse and wiring and remove any other equipment which is on the same electrical circuit to confirm that it is the pump, which is causing the fault.
A: The reason for the reduced flow is because the filter needs cleaning. Check that the filter is correctly sized for the pond. Check that the pump is not sitting directly on the bed of the pond as this can cause debris and silt to be circulated. Check that there is not an excessive build up of sludge in the pond if so clean out the pond. Try a different combination of foams e.g. 2 x coarse and 1 x medium instead of coarse, medium and fine. Note with the latest Bioforce ranges (3000, 5500, 8000 and 12000) these can be cleaned by backflushing without having to remove the lid. Refer to the instruction leaflet. Note: – Instruction leaflets can be downloaded from the website by visiting the customer services tab in the top right hand corner.
A: If the bulbs are blowing only every year or so then this is probably due to the age of the bulb. If they are blowing after only a short period of time then this may be due to water ingress. Check the quartz tube for cracks and also check that the O-rings are in place. Also check that the correct size pump is being used. With a Bioforce, check that the outlet head is not cracked.
A: Check the pump is not too powerful and there are no restrictions on the outlet. Check that the hosetail is intact, the seals are in place and the nut and jubilee clip is tight. Check that all O-rings are in place. Check that the screws have not been over tightened.
A: Check that it is actually green water and not blanket weed by taking a glass of water and checking the colour of the water. If it is clear (perhaps with small particles of green vegetation floating in it) then it is blanket weed, which needs to be treated with a blanket weed treatment. If the water is green (like pea soup), check that your pump and filter are the correct size for your pond by using our pond-sizing guide. Check that the UV bulb is working. If the bulb is over 12 months old it probably needs replacing to maintain performance. Check that the quartz tube is clean and intact.
A: Check that the pond has not become overstocked due to growing fish as you may be asking the filter system to do too much. Check that excess build up of silt/sediment has been cleaned out. Check that soil is not running in from the sides of the pond. Also certain aquatic plant soils are very fine and can work their way out of planting baskets. Remove the plants for a while to see if this is what is causing the problem. Check the foams in the filter for shrinkage as this can cause dirty water to by pass them – change them if necessary. Fish who are hungry for food can disturb the sediment on the floor of the pond as they root around for food. Consider if they are underfed. If the pump is sat on the floor of the pond in sediment then this will be continually distributed through the pond and filter. Raise the pump off the floor of the pond by approximately 6-8 inches (15 – 20cm) This will ensure the pump does not pump sediment and gives the added bonus of providing a water reservoir should a leak occur with equipment outside the pond, as the pump will only empty the pond down to 15 – 20cm from the bottom and not completely empty it.
A: In reality fish don’t really mind the water being cloudy as long as the quality of the water is O.K. so you should either get your water tested by your local aquatics outlet or alternatively buy your own test kit. Make sure the test kit will test Ph, Ammonia, Nitrates and Nitrites. If you but your own test kit of the type with test tablets which give a colour coded indication of the attribute being tested then that’s all you need to decide if the water is OK.
A: The various options available to the pond keeper as the winter approaches fall into two main categories, i.e. continuation of filtration or removal of filtration. The decision is primarily determined by comparing the benefits of continuing filtration, which will help to sustain some degree of biological colony and reduce the risk of the pond freezing over, compared to the running cost and danger of low oxygen due to freezing. From a biological point of view, the continuation of filtration in a heated pond is essential. In an unheated pond, continuation will improve the speed of biological maturation at the beginning of the following season and give some protection in the event of winter warm spells.
If you decide to shut down the filter systems during the winter months, we would recommend the following:
The system should be left to run for at least 2 weeks after feeding has stopped and should then be restarted approximately 3 weeks before feeding commences in the spring.
Never feed your fish whilst the filter is out of operation.
Once removed, the filter and UVC should be thoroughly cleaned with tap water and stored indoors.
If removed, the pump should be cleaned and stored indoors. If the pump is a Prima it should be kept in a bucket of clean water to prevent the seals drying out and cracking.
If the entire system is removed, we advise that a small pump is used to disturb the pond surface or a floating pool heater is installed. This is to try and prevent the pond from freezing over to allow oxygenation of the water.
A: If you have Blanketweed it is better to try to pull most of this out in big clumps before beginning. You can remove a lot of Blanketweed by twisting a stick or cane into the weed as it sits on the pond sides. The pond vac is designed to pick up stones and debris particles up to 8mm. Using the open nozzle will allow larger particles to pass through. The stones shouldn’t go into the black chamber but they can build up. Remove the impellor chamber, shake it and the stones should drop out. Check the hose adaptor by removing the viewing chamber and shake out as stones can sometimes get lodged here.